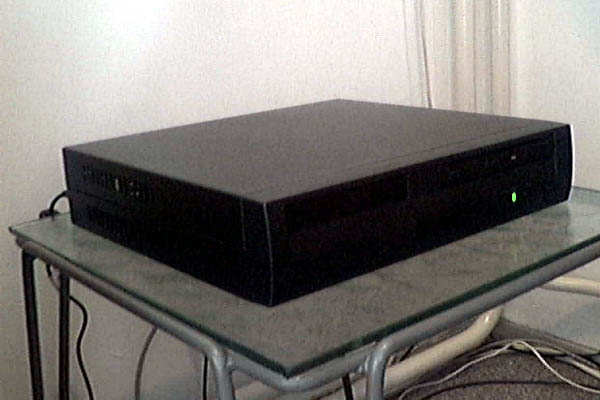
Picture 1: My server.
On this pages I describe how I did setup my own home server connected to the internet via ADSL. I used this server as personal e-mail and web server. It is a fanless computer equiped with a 40 GB harddisk and a CD-ROM drive. The serial port is used as console, avoiding the use of a monitor.
This was my first server, which I did install in 2003 and now has been replaced. Click here for the description of how I did install my second server in 2007 that has been repaced as well. Click here for the description of how I did install my current server in 2025.
Contents:
1. My Requirements
2. The Hardware
3. The Operating System
4. Serial Console Patch
5. Serial Cable
6. My Network Configuration
7. Installing Red Had Linux 8.0
8. Making a Backup First
9. Fixing the LILO Boot Loader
10. Personal Fine Tuning of Red Hat Linux 8.0
11. Creating Additional User Accounts
12. Crontab
13. Telnet
14. FTP
15. DNS
16. E-Mail
17. Filtering Spam
18. Auto-Replying to E-Mail
19. Web Server
20. Web Usage Statistics
21. Samba
22. Disabling Startup of Unused Services
23. NAT Settings ADSL Modem
Glossary and Abbreviations
References
For my server I had the following requirements:
As hardware I have used:
The VIA EPIA VE5000 Motherboard does not need a CPU fan. It provides:
Of these I only needed the ethernet port and the serial port.
The Cubid 2688R Mini-ITX Case is a small 30x28x6cm box. It contains a fan-less 50W power supply, which gets its power from a 12V DC input. It comes with an external 100-240V AC to 12V DC power adapter similar to the ones used with laptops.
Picture 1: My server.
To setup the BIOS, I needed to connect a monitor and a keyboard. This is the only time the monitor and keyboard are needed. Installation of the operating system can be done using the serial port (if you already have a serial boot disk).
I configured the BIOS to boot from CD-ROM and alternatively, when no bootable CD-ROM is detected, to boot from harddisk.
Another important setting is the jumper setting which makes the system to reboot automatically after a power failure. By default the motherboard waited for somebody to press the front power switch before booting up. For a server this is not a good idea.
I not even considered Windows, since it is neither free nor well designed. Since I did want to have a free operating system, the choice was between one of the many Linux distributions and FreeBSD Unix. They are basically all variants of the same flavour.
I have chosen Red Hat Linux 8.0. This was because Red Hat Linux 8.0 is shipped with a lot of software and is well documented. Release 8.0 was the latest release when I made my choice. For more information on Red Hat Linux see http://www.redhat.com/.
Red Hat Linux 8.0 is downloadable for free from many internet mirror sites.p>
One needs to download CD image files, which can be burned onto a CD using standard CD burning software. This can be done under Windows. Linux is not needed to create the set of CDs.
One needs to have the following 3 files / disks:
Two more files / disks containing source code are available:
Disk #1 is bootable. It starts a user-friendly setup program (Anconda), which guides the user through the installation process. This program will later prompt for disk #2 and disk #3. Even if you select a complete installation it will never prompt for disk #4 and disk #5.
There is one problem. The standard distribution of Red Hat Linux 8.0 used the video adapter and the keyboard as console. So a monitor and a keyboard must be connected to the system. To be able to use the serial port instead, I had to patch disk #1, so that it uses the serial port as console.
To create a patched disk #1, a standard Linux system must be setup first, using a monitor and a keyboard.
The original bootable disk #1 must be placed in the CD-ROM drive and mounted with the following command:
mount /dev/cdrom /mnt/cdrom
The contents must be copied to a temporary directory. Hidden files must be copied as well. This is done with the following commands:
mkdir tempcddir
cp -r /mnt/cdrom/* tempcddir
cp -r /mnt/cdrom/.discinfo tempcddir
The boot configuration file must be edited:
vi tempcddir/isolinux/isolinux.cfg
After editing it contains the following lines:
default linux
prompt 1
timeout 100
serial 0 19200
label linux
  kernel vmlinuz
  append initrd=initrd.img lang= devfs=nomount ramdisk_size=9216 text console=ttyS0,19200n8
The files containing the boot messages are removed because they mess up the serial console:
rm tempcddir/isolinux/*.msg
The CD contains images for boot floppies. Similar changes must be made to these floppies. They can be edited by mounting the image files. First a directory is created to which the image files can be mounted:
Modification of the file tempcddir/isolinux/boot.img:mkdir tempfddir
Modification of the file tempcddir/isolinux/bootnet.img:mount -t vfat -o loop tempcddir/images/boot.img tempfddir cp tempcddir/isolinux/isolinux.cfg tempfddir/syslinux.cfg rm tempfddir/*.msg umount tempfddir
Modification of the file tempcddir/isolinux/pcmcia.img:mount -t vfat -o loop tempcddir/images/bootnet.img tempfddir cp tempcddir/isolinux/isolinux.cfg tempfddir/syslinux.cfg rm tempfddir/*.msg umount tempfddir
mount -t vfat -o loop tempcddir/images/pcmcia.img tempfddir
cp tempcddir/isolinux/isolinux.cfg tempfddir/syslinux.cfg
rm tempfddir/*.msg
umount tempfddir
Finally a readme file is created:
vi tempcddir/README-Serial-Console-Modifications
With the following command a new CD image is created, which can be burned again onto a CD using standard CD burning software (either under Linux or under Windows):
mkisofs -o cdfile.iso -b isolinux/isolinux.bin -no-emul-boot \
-boot-load-size 4 -boot-info-table -R -J -T tempcddir
Note that I did not test the boot floppy images. In my system there are no floppy drives.
To connect my server to my laptop a cross-over cable is needed, connecting TXD of the server to RXD of the laptop, and RXD of the server to TXD of the laptop. The hardware handshake signals are looped back. Figure 1 shows the cable pinning.
Figure 1: Serial cross-over cable.
I got a single public IP address 82.161.42.40 from my internet provider. My internet provider (forward and reverse) maps this IP address to the name ip52a12a28.xs4all.nl.
My home network is connected to the internet via an Alcatel Speedtouch 510 ADSL modem. This modem provides Network Address Translation (NAT), Dynamic Host Configuration (DHCP) and a name server (DNS). It can connect to up to 4 ethernet devices via it's build-in hub.
My home network uses internal IP addresses, which can not be reached directly from the internet:
When IP packages pass through the ADSL modem, these internal IP addresses are translated into my public IP address and back. For traffic originating from my home network, the network address translator knows from which internal IP address the session originates. That way it is later able to send the response back to the right internal IP address.
For traffic originating from the internet, the network address translator has a table telling which protocols are handled by which internal IP address. If it receives an IP package of which the protocol is not listed in the table, they are discarded. By doing so it provides firewall functionality as a by-product of the network address translation. The network address translation table in my ADSL modem is configuered to forward the following protocols to my server (IP address 10.0.0.254):
For more information about Network Address Translation see "RFC3022" ([1]).
Figure 2: My network configuration.
I have registered my own domain fwiarda.com at Network Solutions ( see http://www.netsol.com/). Within this domain:
If one registers a domain at Network Solutions, one has to specify the name servers which resolve the domain. Here I do specify ns.fwiarda.com (plus some additional external backup name servers I have rented for backup purposes). Network Solutions takes care my name servers are listed in the internet's root name servers, so clients can resolve my domain.
To install Red Hat Linux 8.0 we connect a laptop with the serial cross-over cable to the serial port of the server. At the laptop we run a VT100 terminal emulator (like Kermit 95). The serial port settings are 19200 baud, no-parity and 8 data bits.
NOTE: Unless indicated otherwise, the remainder of this description is valid as well when you want a standard installation which uses the monitor and keyboard as console. Just, use the original disk #1 instead of the patched disk #1.
The patched disk #1 is placed in the CD-ROM drive, and the server is reset. Linux boots and the Red Hat installation program Anaconda starts automatically. Choose the following configuration options:
Now we can reboot the system. After reboot it starts up with a login prompt. Further configuration must be done while logged in as root.
In the remainder of this page we do edit a lot of files. It is a good practice to make a
backup copy of the original file with a .old extension before editing.
The system configuration is basically determined by the files in the /etc tree. The whole
tree can be backed up to a file /root/etc.tar.gz with the
command:
tar -zcf /root/etc.tar.gz /etc
And it can be restored again with the commands:
cd /
rm -rf /etc
tar -zxf /root/etc.tar.gz
The first thing one has to do is editing the file /etc/lilo.conf to make a minor fix to the LILO boot loader. (NOTE: For a standard installation using the monitor and keyboard as console instead of the serial port this change shall not be made.)
Before booting the system the LILO boot loader prompts the user for boot parameters. During this very first phase of the boot, the baud rate has not yet been set correctly, causing the initial prompt to be garbled. We fix this by changing the line serial=0 into serial=0,19200n8.
Now the file /etc/lilo.conf contains the following lines:
prompt
timeout=50
default=linux
boot=/dev/hda
map=/boot/map
install=/boot/boot.b
serial=0,19200n8
lba32

image=/boot/vmlinuz-2.4.18-14
	label=linux
	initrd=/boot/initrd-2.4.18-14.img
	read-only
	append="root=LABEL=/ console=ttyS0,19200n8"
The command lilo is executed to write the changes we made to the master boot record.
The changes in this section are fine tunings which are a matter of personal taste. The system will work fine without them.
The file /etc/bashrc is edited to contain the following lines:
# If we are an interactive shell and the terminal is an xterm,
# the environment variable PROMPT_COMMAND is set to manipulate
# the window title.
if [ "$PS1" ]; then
    case $TERM in
        xterm*)
                PROMPT_COMMAND='echo -ne "\033]0;${USER}@${HOSTNAME%%.*}:${PWD/#
$HOME/~}"; echo -ne "\007"'
                ;;
        *)
                PROMPT_COMMAND=''
            ;;
    esac
fi

# Group and world do not get write permision on newly created files.
umask 022

# Define the equivalent of DOS commands as aliases.
alias copy="cp -v"
alias del="rm"
alias dir="ls -l"
alias md="mkdir"
alias ren="mv"
alias rd="rmdir"
alias cls="clear"

# These changes reflect my personal taste.
alias info="info --vi-keys"
alias l.="ls --color=never -p -a"
alias ll="ls --color=never -p -l"
alias ls="ls --color=never -p"
alias vi="/bin/vi"
The following lines are added to /etc/profile:
# A VT100 is a subset of of the ansi definition and more reliable.
if [ $TERM = ansi ] ; then TERM=vt100 ; fi
export TERM

# Define keys for command line editing. Note that ^H is
# actually the backspace character.
if [ $TERM != xterm ] ; then
	stty erase ^H
fi
bind -f /etc/inputrc

# Get rid of strange characters in man pages.
LANG=en_US
export LANG

# Define the prompt to be "user@host:directory $".
PS1='\u@\h:\w \$ '
export PS1

# Use the global vi settings file.
EXINIT='so /etc/exrc'
export EXINIT

# Man shall look for man pages in /usr/local/share/man as well.
MANPATH=/usr/share/man:/usr/local/share/man
export MANPATH
A global vi settings file /etc/exrc is created to contain the following lines:
# Autoindentation on.
set autoindent

#colors off.
syn off
I like to have Windows XP style command line editing. To enable this the file /etc/inputrc must contain the following lines:
# Windows style command line editing.
set completion-ignore-case on
set mark-directories off
set match-hidden-files off

tab: menu-complete

del: delete-char
"\e[3~": delete-char
"\e[3;2~": delete-char
$if term=xterm
	del: backward-delete-char
$endif
$if term=linux
	del: backward-delete-char
$endif
control-h: backward-delete-char

# Re-mapping of some keys that where not mapped well.
"\e[5~": beginning-of-history
"\e[6~": end-of-history

# A VT100 does not have a Home, End, PgUp and PgDn key. In my
# terminal emulator I programmed the vi key sequences for these
# actions under the these keys.
"\e\C-u": beginning-of-history
"\e\C-d": end-of-history
"\e0": beginning-of-line
"\e$": end-of-line

"\e[5~": beginning-of-history
"\e\C-u": beginning-of-history

"\e[6~": end-of-history
"\e\C-d": end-of-history

"\e0": beginning-of-line

"\e$": end-of-line

"\e[1;5C": forward-word
"\e[5C": forward-word
"\e\e[C": forward-word

"\e[1;5D": backward-word
"\e[5D": backward-word
"\e\e[D": backward-word
The file /etc/mail.rc has been edited to contain the following lines:
# Ask for the mail subject when accepting mail from a terminal.
set asksub

# Terminate mail input with a line containing a single dot.
set dot

# Retain read messages in the system mailbox instead of moving them
# to the mbox file.
set hold

# Don't save a message to the file dead.letter when input of the message
# is aborted with ctrl-C.
set nosave

# Don't display Received headers.
ignore Received
Two additional user accounts are created.
The account server is used for administrative purposes, like storing the web pages with usage statistics.
The account fwiarda is my personal account. My personal web site is stored under this account. I do receive my personal e-mail on this account. I mount the home directory of this account as an additional drive on my PC.
Creating the additional accounts is done by issuing the following comands:
useradd server -c "Server Administration"
useradd fwiarda -c "Frits Wiarda"
chmod 755 /home/server
chmod 755 /home/fwiarda
passwd server
passwd fwiarda
Note that with the chmod commands I make users home directories readable for all. The default for Red hat Linux 8.0 is that users home directories are strictly private. I consider this not handy since my users are myself in different roles, and now and then perhaps a well trusted friend.
I create a link /home/root as an alias to the root's home directory. I make the root's home directory world readable as well. Issuing the following commands does this:
ln -s /root /home/root
chmod 755 /root
After installation the root mail is flooded with mail containing all kind of periodic reports. So I consider it desirable to clean all crontabs, and then add the things I consider useful.
Crontab is a feature which periodically executes certain tasks. There are two types of crontabs, user crontabs and system crontabs.
User crontabs are managed with the command crontab. After installation a crontab exists for the user mailman. This crontab is removed with the command:
crontab -u mailman -r
System crontabs are managed by editing the file /etc/crontab. By default this file contains 4 entries which periodically executes all executable files in the directories /etc/cron.hourly, /etc/cron.daily, /etc/cron.weekly, and /etc/cron.monthly. A 5th entry exists which calls the Multi Router Traphic Grapher, which we do not need. The file /etc/crontab is edited to contain the following lines:
SHELL=/bin/bash
PATH=/sbin:/bin:/usr/sbin:/usr/bin:/usr/local/sbin:/usr/local/bin
MAILTO=root
HOME=/root

0 * * * * root run-parts /etc/cron.hourly
10 0 * * * root run-parts /etc/cron.daily
20 0 * * 0 root run-parts /etc/cron.weekly
30 0 1 * * root run-parts /etc/cron.monthly
The directories containing the files to be executed periodically are cleaned with the following commands:
mv /etc/cron.hourly /etc/cron.hourly.old
mv /etc/cron.daily /etc/cron.daily.old
mv /etc/cron.weekly /etc/cron.weekly.old
mv /etc/cron.monthly /etc/cron.monthly.old
mkdir /etc/cron.hourly
mkdir /etc/cron.daily
mkdir /etc/cron.weekly
mkdir /etc/cron.monthly
A file /etc/cron.daily/cleanup has been created containing the
following
lines:
#!/bin/bash
/usr/sbin/tmpwatch 24 /tmp
/usr/sbin/tmpwatch 24 /var/spool/squirrelmail/attach
After editing the permissions for this file have been changed with the
command:
chmod 755 /etc/cron.daily/cleanup
By default telnet is disabled on Red Hat Linux 8.0. To enable it edit the file /etc/xinetd.d/telnet and change disable = yes into disable = no. The change becomes effective after the xinet-daemon has been restarted, or after a system reboot.
By default Red Hat Linux 8.0 disallows root login via telnet, since it is considered insecure because telnet uses unencrypted password verification. However on a home network behind a firewall security is not an issue. To enable root login via telnet add the following lines to the file /etc/securetty:
pts/0
pts/1
pts/2
pts/3
pts/4
pts/5
pts/6
pts/7
pts/8
pts/9
pts/10
pts/11
By default FTP is disabled on Red Hat Linux 8.0. To enable it edit the file /etc/xinetd.d/wu-ftpd and change disable = yes into disable = no. The change becomes effective after the xinet-daemon has been restarted, or after a system reboot.
To configure FTP the file /etc/ftpaccess is edited and shall contain the following lines:
class all real,guest,anonymous *
email fwiarda@fwiarda.com
hostname server.fwiarda.com
log transfers anonymous,guest,real inbound,outbound
By default Red Hat Linux 8.0 disallows root login via FTP, since it is considered insecure because FTP uses unencrypted password verification. On the other hand it allows by default anonymous login, which is of no use to a personal web server. To change this the file /etc/ftpusers is. The entry root is removed. An en entry ftp is added.
By default DNS is disabled on Red Hat Linux 8.0. To enable it the following commands must be executed:
mv /etc/rc.d/rc2.d/K45named /etc/rc.d/rc2.d/S55named
mv /etc/rc.d/rc3.d/K45named /etc/rc.d/rc3.d/S55named
mv /etc/rc.d/rc4.d/K45named /etc/rc.d/rc4.d/S55named
mv /etc/rc.d/rc5.d/K45named /etc/rc.d/rc5.d/S55named
The renaming of these files makes that the DNS server is started during system boot.
A directory /etc/named is created to store our zone files. I do not like the Red Hat
Linux 8.0 default /var/named. Having all configuration files in the /etc tree makes
it easier to backup the servers configuration.
The root hints file /var/named/named.ca is copied to /etc/named/named.root. This file
contains references to the internet's master name servers. It is advisable to check
yearly for updates of this file at ftp://ftp.rs.internic.net/domain/.
For each domain for which we have the authority, we have to create a zone file
resolving that domain.
Since my server is connected to the internet via a network address translating (NAT)
ADSL modem, different IP addresses are needed to approach my server from the internet
and from my home network. From the internet my server has to be approached with the
public IP address 82.161.42.40 provided by my internet service provider. The ADSL modem
translates this address into the internal IP address 10.0.0.254. If I approach my
server from my internal home network, I have to use the internal IP address
10.0.0.254 directly.
Since my DNS has to return an internal IP address to clients locally on my home
network (e.g. my laptop), different views are created. My DNS will return different information to request from local clients
compared to requests from clients on the internet.
Ofcause the above requires that I specify my own DNS server
10.0.0.254 as the prefered DNS in the network configuration of all my
local clients. That can be done either by editing the network settings for each
client, or by editing the settings for the DHCP server in the ADSL modem (not
possible on older Alcatel SpeedTouch 510 models).
My DNS has to do the following:
To cater for the above, the file /etc/named.conf must contain the following lines:
options {
	directory "/etc/named";
	max-cache-size 1m;
};

logging {
	category lame-servers { null; };
};

view "local" IN {
	match-clients { localnets; };
	recursion yes;
	zone "fwiarda.com." IN {
		type master;
		file "fwiarda.com.lzone";
	};
	zone "ip52a12a28.xs4all.nl." IN {
		type master;
		file "ip52a12a28.xs4all.nl.lzone";
	};
	zone "." IN {
		type hint;
		file "named.root";
	};
};

view "world" IN {
	match-clients { any; };
	recursion no;
	zone "fwiarda.com." IN {
		type master;
		file "fwiarda.com.zone";
	};
};$TTL 2h
@ IN SOA ns.fwiarda.com. fwiarda.xs4all.nl. (
1 ; serial
3h ; refresh
1h ; retry
1w ; expire
1h ) ; negative caching ttl
@ IN NS ns.fwiarda.com.
@ IN A 10.0.0.254
@ IN MX 0 mail.fwiarda.com.
@ IN TXT "v=spf1 mx -all"
ftp.fwiarda.com. IN A 10.0.0.254
mail.fwiarda.com. IN A 10.0.0.254
ns.fwiarda.com. IN A 10.0.0.254
pc.fwiarda.com. IN A 10.0.0.201
telnet.fwiarda.com. IN A 10.0.0.254
server.fwiarda.com. IN A 10.0.0.254
www.fwiarda.com. IN A 10.0.0.254
mail.fwiarda.com. IN MX 0 mail.fwiarda.com.
mail.fwiarda.com. IN TXT "v=spf1 mx -all"
The zone file ip52a12a28.xs4all.nl.lzone resolving local requests for the ip52a12a28.xs4all.nl sub-domain contains the following lines:
$TTL 2h

@  IN  SOA   ns.fwiarda.com.   fwiarda.xs4all.nl. (
                                  1 ; serial
                                  3h ; refresh
                                  1h ; retry
                                  1w ; expire
                                  1h ) ; negative caching ttl

@  IN  NS    ns.fwiarda.com.

@  IN  A     10.0.0.254
The zone file fwiarda.com.zone resolving requests from the internet
for the fwiarda.com domain contains the following lines:
$TTL 2h

@  IN  SOA   ns.fwiarda.com.   fwiarda.xs4all.nl. (
                                  1 ; serial
                                  3h ; refresh
                                  1h ; retry
                                  1w ; expire
                                  1h ) ; negative caching ttl

@ IN  NS    ns.fwiarda.com.

@ IN  A     82.161.42.40

@ IN  MX    0    mail.fwiarda.com.

ftp.fwiarda.com.               IN  A   82.161.42.40
mail.fwiarda.com.              IN  A   82.161.42.40
ns.fwiarda.com.                IN  A   82.161.42.40
pc.fwiarda.com.                IN  A   82.161.42.40
telnet.fwiarda.com.            IN  A   82.161.42.40
server.fwiarda.com.            IN  A   82.161.42.40
www.fwiarda.com.               IN  A   82.161.42.40

mail.fwiarda.com.       IN  MX  0    mail.fwiarda.com.
Note that I have not used my regular e-mail address fwiarda@fwiarda.com in the SOA record , but the e-mail address fwiarda@xs4a11.n1 (which is written in SOA format as fwiarda.xs4all.nl), which I got from my internet service provider XS4ALL. If there are problems with my name server or my domain, it is likely that my e-mail address is experiencing problems as well. Therefore I use my e-mail address fwiarda@xs4a11.n1 for things like domain registration and maintenance. Normally this address is forwarded to my regular e-mail address fwiarda@fwiarda.com, but when I am experiencing problems I can cancel this forward and use the fwiarda@xs4a11.n1 address to communicate with the helpdesk.
The changes in this section become effective after the named-daemon is started manually or after a system reboot.
For more information about DNS see "DNS and BIND" ([2]);
By default POP3 and IMAP are disabled on Red Hat Linux 8.0. To enable it edit the files /etc/xinetd.d/ipop3 and /etc/xinetd.d/imap and change in both files disable = yes into disable = no. The change becomes effective after the xinet-daemon has been restarted, or after a system reboot.
To speed up mail delivery I have edited the file /etc/sysconfig/sendmail, and changed QUEUE=1h into QUEUE=10m. This change makes that the mail queue is processed every 10 minutes instead of every hour.
I have edited the file /etc/mail/sendmail.mc. to contain the following lines:
include(`/usr/share/sendmail-cf/m4/cf.m4')
OSTYPE(`linux')
VERSIONID(`linux setup for Red Hat Linux')
define(`confAUTH_MECHANISMS',`GSSAPI LOGIN PLAIN')
define(`confCW_FILE',`/etc/mail/local-host-names')
define(`confDOMAIN_NAME',`mail.fwiarda.com')
define(`confDONT_BLAME_SENDMAIL',`GroupWritableDirPathFile')
define(`confDONT_BLAME_SENDMAIL',`GroupWritableDirPathFileSafe')
define(`confDONT_BLAME_SENDMAIL',`GroupWritableForwardFile')
define(`confDONT_BLAME_SENDMAIL',`GroupWritableForwardFileSafe')
define(`confDONT_BLAME_SENDMAIL',`GroupWritableIncludeFile')
define(`confDONT_BLAME_SENDMAIL',`GroupWritableIncludeFileSafe')
define(`confDOUBLE_BOUNCE_ADDRESS',`null')
define(`confFORWARD_PATH',`$z/.forward')
define(`confMAX_MESSAGE_SIZE',`0')
define(`confTO_QUEUERETURN',`12h')
define(`confTO_QUEUEWARN',`30m')
define(`ALIAS_FILE',`/etc/mail/aliases')
TRUST_AUTH_MECH(`GSSAPI LOGIN PLAIN')
FEATURE(`accept_unresolvable_domains')
FEATURE(`allmasquerade')
FEATURE(`always_add_domain')
FEATURE(`limited_masquerade')
FEATURE(`masquerade_envelope')
FEATURE(`use_cw_file')
FEATURE(`virtusertable',`hash /etc/mail/virtusertable.db')
MASQUERADE_AS(`mail.fwiarda.com')
MASQUERADE_DOMAIN(`server.fwiarda.com')
MAILER(`smtp')
After editing the file the following command must be executed:
m4 /etc/mail/sendmail.mc >/etc/mail/sendmail.cf
I have edited the file /etc/mail/submit.mc to contain the following
lines:
include(`/usr/share/sendmail-cf/m4/cf.m4')
OSTYPE(`linux')
VERSIONID(`linux setup for Red Hat Linux')
define(`confCF_VERSION',`Submit')
define(`confPID_FILE',`/var/run/sm-client.pid')
define(`confTIME_ZONE',`USE_TZ')
FEATURE(`msp')
After editing the file the following command has been executed:
m4 /etc/mail/submit.mc >/etc/mail/submit.cf
I have edited the file /etc/mail/local-host-names to contain the following lines:
server.fwiarda.com
mail.fwiarda.com
ip52a12a28.xs4all.nl
fwiarda.com
I have edited the file /etc/mail/aliases to contain the following lines:
adm: 			bounce
amanda: 		bounce
apache: 		bounce
bin: 			bounce
canna: 			bounce
desktop: 		bounce
ftp: 			bounce
games: 			bounce
gdm: 			bounce
gopher: 		bounce
halt: 			bounce
ident: 			bounce
ldap: 			bounce
lp: 			bounce
mail: 			bounce
mailman: 		bounce
mailnull: 		bounce
mysql: 			bounce
named: 			bounce
netdump: 		bounce
news: 			bounce
nfsnobody: 		bounce
nobody: 		bounce
nscd: 			bounce
ntp: 			bounce
pcap: 			bounce
postfix: 		bounce
postgres: 		bounce
privoxy: 		bounce
pvm: 			bounce
radvd: 			bounce
rpc: 			bounce
rpcuser: 		bounce
rpm: 			bounce
shutdown: 		bounce
smmsp: 			bounce
squid: 			bounce
sshd: 			bounce
sync: 			bounce
uucp: 			bounce
vcsa: 			bounce
webalizer: 		bounce
wnn: 			bounce
xfs: 			bounce

mailer-daemon: 		/dev/null
null: 			/dev/null
root: 			fwiarda

server 	        	bounce
I have edited the file /etc/mail/virtusertable to contain the following lines:
fwiarda@fwiarda.com		fwiarda
null@fwiarda.com		null
bounce@fwiarda.com		bounce
@fwiarda.com			error:5.1.6:550 Mail to fwiarda@fwiarda.com instead
When hosting additional e-mail domains, a tab-separated list of e-mail addresses and the local mailboxes or aliases on which they must be mapped must be added to the file /etc/mail/virtusertable. Leaving the part of the e-mail address before the @ sign away maps the entire domain. Note that all domains for which e-mail can be received must be listed in the file /etc/mail/local-host-names.
For more information about e-mail see the book titled "Sendmail" ([3]).
I use spamassassin to tag spam for mail send to my personal mail account. My spamassassin configuration file /etc/mail/spamassassin/local.cf contains the following lines:
report_header 1
rewrite_subject 0
defang_mime 0
Besides the lines above, I have added some personal rules to the file /etc/mail/spamassassin/local.cf . These rules are outside the scope of this document.
I have created a file /etc/mail/spamassassin/whitelist.cf containing the e-mail addresses of my contacts in lines like:
whitelist_from user@domain
I have created a file /etc/mail/spamassassin/blacklist.cf containing the e-mail addresses of people from who I do not want to receive e-mail in lines like:
blacklist_from user@domain
I have written a procmail script which moves spam to a seperate mailbox ~/mail/Spam. The suspected spammer will receive a mail that his e-mail has been deleted. In this mail he is informed that he can bypass the spam filter by starting the subject field with the keyword NOSPAM. Real spammers do not read bounced messages. But legitimate senders whose mail is accidentally tagged as spam will do. Click here for a copy of the script. Beware DOS to Unix text file conversion (CR-LF to LF) when downloading it. The script is self ducmenting. Copy it to /usr/local/bin/spamfilter. The file must be executable for everybody. This can be done with the command:
chmod 755 /usr/local/bin/spamfilter
To have all my e-mail filtered, I have created a /home/fwiarda/.forward containing the following line:
"|/usr/local/bin/spamfilter email=fwiarda@fwiarda.com"
Note that sendmail requires the /home/fwiarda/.forward file to be owned by fwiarda and not being world readable. When the file has been created by root, the following commands fix this:
chmod 644 /home/fwiarda/.forward
chown fwiarda:fwiarda /home/fwiarda/.forward
Red Hat Linux 8.0 does not come with a vacation program, to auto-reply to your
mail. I have written a perl script myself, which mimics the Unix vacation
program.
In most aspects this script is stripped down in functionality compared to the Unix vacation program. However, with the handling of .forward files it is more advanced. If a .forward file already exists and contains forwards to something else then vacation, it adds a line to the original .forward file instead of overwriting it. Later, when vacation is disabled, this line is deleted again. This behaviour leaves other forwards intact.
Click here for a copy of the script. Beware DOS to Unix text file conversion (CR-LF to LF) when downloading it. The script is self ducmenting. Copy it to /usr/local/bin/vacation. The file must be executable for everybody. This can be done with the command:
chmod 755 /usr/local/bin/vacation
By default the Apache web server is disabled at Red Hat Linux 8.0. To enable it the following commands must be executed:
mv /etc/rc.d/rc2.d/K15httpd /etc/rc.d/rc2.d/S85httpd
mv /etc/rc.d/rc3.d/K15httpd /etc/rc.d/rc3.d/S85httpd
mv /etc/rc.d/rc4.d/K15httpd /etc/rc.d/rc4.d/S85httpd
mv /etc/rc.d/rc5.d/K15httpd /etc/rc.d/rc5.d/S85httpd
The renaming of these files makes that the Apache web server is started during system boot. Note that we also rename the files from *15* into *86* This ensures the Apache web server is started after the name server has been started. In that case it is not able to resolve the host names used in it's configuration file.
The following lines must be added to or changed in the main server configuration section of /etc/httpd/conf/httpd.conf:
# Set my e-mail address as the server administrators e-mail.
ServerAdmin "fwiarda@fwiarda.com"
# Set the name of the server. ServerName "server.fwiarda.com"# Each directory to which Apache has access can be configured with respect # to which services and features are allowed and/or disabled in that # directory (and its subdirectories). # # We configure the default to be a very relaxed set of features, # so we do not have to switch them on seperately for each virtual # server. <Directory "/"> Options All AllowOverride All Order allow,deny Allow from all </Directory> # We set the documents defining a directory index. DirectoryIndex "index.htm" "index.html" "index.txt" "index.cgi" "index.php" # The default is to present a test page if there is no index file in # the document root directory. We like Apache to display the directory # contents instead, by commenting the corresponding directives out. #<LocationMatch "^/$> # Options -Indexes # ErrorDocument 403 /error/noindex.html #</LocationMatch> # We define the format of directory listings. IndexOptions FancyIndexing NameWidth=* FoldersFirst SuppressDescription # We disable headers and readme files in directory listings by commenting # the corresponding directives out. #ReadmeName README.html #HeaderName HEADER.html # All files ending with .cgi are scripts, even if they are not placed # in a special directory for cgi-scripts. AddHandler cgi-script .cgi # We set .htaccess to be the file from which access permission can be # overriden. AccessFileName ".htaccess" # We do not want .htaccess, .htpasswd and .htgroup files to be displayed. <Files ~ "^\.ht"> Order allow,deny Deny from all </Files> # We lookup the hostnames for the IP addresses to which # we provide pages. This makes our log files more readable. HostnameLookups On # We set the error log file. ErrorLog "/var/log/httpd/error_log" # We set the access log file. CustomLog "/var/log/httpd/access_log" combined # We don't want to have the server name below directory indexes generated # by Apache. ServerSignature Off # Disable http://server.fwiarda.com/manual/ to be the Apache # manual, by commenting the corresponding directives out. #Alias /manual "/var/www/manual" # #<Directory "/var/www/manual"> # Options Indexes FollowSymLinks MultiViews # AllowOverride None # Order allow,deny # Allow from all #</Directory> # Disable http://server.fwiarda.com/cgi-bin/ to be a server # wide script directory. #ScriptAlias /cgi-bin/ "/var/www/cgi-bin/"
These settings are valid for all virtual hosts. The following lines have been added to or changed in the virtual host section of /etc/httpd/conf/httpd.conf:
# We define we are going to use name based virtual hosting.
NameVirtualHost "10.0.0.254"

# This entry is the default entry. It is used when the hostname in the
# URL is not known to us. Hackers just trying our IP address end up here.
# We will always return an empty page with mime-type text/plain. All
# settings for this entry are taken form the main server configuration
# section above.
<VirtualHost "10.0.0.254">
	<Directory "/dev">
		ForceType text/plain
	</Directory>
	AliasMatch .* "/dev/null"
	CustomLog "/var/log/httpd/access_log" combined
	ErrorLog "/var/log/httpd/error_log"
</VirtualHost>

# The entry for calls to http://mail.fwiarda.com/ . It accesses
# SquirrelMail, a web based mail client which is part of the Red Hat
# Linux 8.0 distribution. Since it is a web site on it's own,
# it has it's own error log and access log files.
<VirtualHost "10.0.0.254">
	ServerName "mail.fwiarda.com"
	DocumentRoot "/usr/share/squirrelmail"
	ErrorLog "/var/log/httpd/mail.fwiarda.com.error_log"
	CustomLog "/var/log/httpd/mail.fwiarda.com.access_log" combined
</VirtualHost>

# The entry for calls to http://server.fwiarda.com/ .
# It has it's own error log and access log files.
<VirtualHost "10.0.0.254">
	ServerName "server.fwiarda.com"
	DocumentRoot "/home/server/www"
	ErrorLog "/var/log/httpd/server.fwiarda.com.error_log"
	CustomLog "/var/log/httpd/server.fwiarda.com.access_log" combined
</VirtualHost>

# The entry for calls to my personal web site
# http://www.fwiarda.com/ . It has it's own document root, and it's
# own, error log and access log files.
<VirtualHost "10.0.0.254">
	ServerName "www.fwiarda.com"
	ServerAlias "fwiarda.com"
	DocumentRoot "/home/fwiarda/www"
	ErrorLog "/var/log/httpd/www.fwiarda.com.error_log"
	CustomLog "/var/log/httpd/www.fwiarda.com.access_log" combined
</VirtualHost>
Since I have defined http://mail.fwiarda.com/ to access SquirrelMail, I considered it not necessary that http://server.fwiarda.com/webmail/ accesses SquirrelMail as well. The /etc/httpd/conf.d/squirrelmail.conf has been edited to delete the line:
Alias /webmail /usr/share/squirrelmail
The document root directory, the directory containing the log files, and all the directories above them, must be searchable and readable for the user apache. To be able to test this, it practical to login as user apache. However, by default no login shell is assigned to the user apache. We fix this editing the file /etc/passwd and changing the line:
apache:x:48:48:Apache:/var/www:/sbin/nologin
into:
apache:x:48:48:Apache:/var/www:/bin/bash
When logged-in as root, we can now log-in as apache by issuing the following command:
su - apache
If there is any flaw in file access permission settings, they will become clearly noticeable.
The web site http://server.fwiarda.com/ is used for accessing the access and error logs, and the usage statistics of my server. The directory /home/server/www is the document root for this web site. It must be created, as well as sub-directories for usage statistics and a link to the directory containing the servers log files:
mkdir /home/server/www
mkdir /home/server/www/usage
mkdir /home/server/www/usage/mail.fwiarda.com
mkdir /home/server/www/usage/server.fwiarda.com
ln -s /var/log/httpd /home/server/www/log
chmod 755 /var/log/httpd
I do not want everybody to have access to my logs and usage statistics. Therefore a file /home/server/www/.htaccess is created, containing the following lines:
AuthUserFile /home/server/www/.htpasswdAuthName "Server Administrator" AuthType Basic<Limit GET POST> require valid-user </Limit>
A file /home/server/www/.htpasswd is created by issuing the following commands:
htpasswd /home/server/www/.htpasswd root
htpasswd /home/server/www/.htpasswd fwiarda
The htpasswd program prompts for the appropriate passwords.
The ownership of the /home/server/www tree shall belong to the user server. If this directory tree has been created while being logged-in as root, the ownership must be transferred with the following command:
chown -R server:server /home/server/www
For more information about the Apache web server see "Apache; The Definitive Guide" ([4]).
Webalizer is a tool for generating usage statistics for web pages.
The file /etc/webalizer.conf is edited, to ensure the following parameters are defined or commented out:
# We will specify the log file at the command line.
# The entry LogFile is commented out.
#LogFile /var/log/httpd/access_log
# We will specify the output directory at the command line. # The entry OutputDir is commented out. #OutputDir .# The file webalizer.hist in the output directory will # contain the data for previous months. HistoryName webalizer.hist# We only process entries not yet processed before. We # retrieve the old usage information form the files # webalizer.hist and webalizer.current Incremental yes# The file webalizer.current in the output directory will # contain the data for the current month. IncrementalName webalizer.current# For debugging purposes we enable log messages. When # webalizer is called from a script, we suppres all messages # by adding the -Q option at the command line. Quiet no
A file /etc/cron.daily/webalizer is created. This file is executed daily since it resides in the /etc/cron.daily directory. It must contain the following lines:
#!/bin/bash
if [ -s /var/log/httpd/server.fwiarda.com.access_log ] ; then
	/usr/bin/webalizer -Q \
		-n server.fwiarda.com \
		-r server.fwiarda.com \
		-o /home/server/www/usage/server.fwiarda.com \
		/var/log/httpd/server.fwiarda.com.access_log
fi
if [ -s /var/log/httpd/mail.fwiarda.com.access_log ] ; then
	/usr/bin/webalizer -Q \
		-n mail.fwiarda.com \
		-r mail.fwiarda.com \
		-o /home/server/www/usage/mail.fwiarda.com \
		/var/log/httpd/mail.fwiarda.com.access_log
fi
if [ -s /var/log/httpd/www.fwiarda.com.access_log ] ; then
	/usr/bin/webalizer -Q \
		-n www.fwiarda.com \
		-r www.fwiarda.com \
		-r fwiarda.com \
		-o /home/server/www/usage/www.fwiarda.com \
		/var/log/httpd/www.fwiarda.com.access_log
fi
After editing this file must be made executable with the command:
chmod 755 /etc/cron.daily/webalizer
By default samba is disabled at Red Hat Linux 8.0. To enable it the following commands must be executed:
mv /etc/rc.d/rc2.d/K35smb /etc/rc.d/rc2.d/S65smb
mv /etc/rc.d/rc3.d/K35smb /etc/rc.d/rc3.d/S65smb
mv /etc/rc.d/rc4.d/K35smb /etc/rc.d/rc4.d/S65smb
mv /etc/rc.d/rc5.d/K35smb /etc/rc.d/rc5.d/S65smb
The file /etc/samba/smb.conf is edited and shall contain the following lines:
[global]
workgroup = fwiarda-group
netbios name = fwiarda-server
server string = Frits Wiarda's Server
encrypt passwords = yes
security = user
time service = yes

[fwiarda]
path = /home/fwiarda
comment = /home/fwiarda
read only = no
create mask = 644
force create mode = 644
directory mask = 755
force directory mode = 755
guest ok = no
Samba uses the passwords from file /etc/smbpasswd instead of /etc/passwd or /etc/shadow. That means separate passwords for samba must be created. This is done with the following comand:
smbpasswd -a fwiarda
The smbpasswd program prompts for the appropriate password.
For more information on samba see "Using Samba" ([5]).
Linux knows different run levels:
When the system boots, it reads from the file /etc/inittab to which run level it should switch. It will then run the startup scripts for this run level (see /etc/rc.d/rc?.d).
We will use the unused run level 4. To have the system boot in run level 4, we edit /etc/inittab changing the initdefault line into:
id:4:initdefault:
With the following rename we make that only the services we need are started:
mv /etc/rc.d/rc4.d/S05kudzu      /etc/rc.d/rc4.d/K95kudzu
mv /etc/rc.d/rc4.d/S08ip6tables  /etc/rc.d/rc4.d/K92ip6tables
mv /etc/rc.d/rc4.d/S08ipchains   /etc/rc.d/rc4.d/K92ipchains
mv /etc/rc.d/rc4.d/S08iptables   /etc/rc.d/rc4.d/K92iptables
mv /etc/rc.d/rc4.d/S09isdn       /etc/rc.d/rc4.d/K91isdn
mv /etc/rc.d/rc4.d/S13portmap    /etc/rc.d/rc4.d/K87portmap
mv /etc/rc.d/rc4.d/S14nfslock    /etc/rc.d/rc4.d/K86nfslock
mv /etc/rc.d/rc4.d/S17keytable   /etc/rc.d/rc4.d/K83keytable
mv /etc/rc.d/rc4.d/S24pcmcia     /etc/rc.d/rc4.d/K76pcmcia
mv /etc/rc.d/rc4.d/S25netfs      /etc/rc.d/rc4.d/K75netfs
mv /etc/rc.d/rc4.d/S26apmd       /etc/rc.d/rc4.d/K74apmd
mv /etc/rc.d/rc4.d/S28autofs     /etc/rc.d/rc4.d/K72autofs
mv /etc/rc.d/rc4.d/S56rawdevices /etc/rc.d/rc4.d/K44rawdevices
mv /etc/rc.d/rc4.d/S84privoxy    /etc/rc.d/rc4.d/K16privxy
mv /etc/rc.d/rc4.d/S85gpm        /etc/rc.d/rc4.d/K15gpm
mv /etc/rc.d/rc4.d/S90canna      /etc/rc.d/rc4.d/K10canna
mv /etc/rc.d/rc4.d/S90xfs        /etc/rc.d/rc4.d/K10xfs
mv /etc/rc.d/rc4.d/S95anacron    /etc/rc.d/rc4.d/K05anacron
mv /etc/rc.d/rc4.d/S95atd        /etc/rc.d/rc4.d/K05atd
mv /etc/rc.d/rc4.d/S97rhnsd      /etc/rc.d/rc4.d/K03rhnsd
mv /etc/rc.d/rc4.d/S98wine       /etc/rc.d/rc4.d/K02wine
mv /etc/rc.d/rc4.d/S99mdmonitor  /etc/rc.d/rc4.d/K99mdmonitor
The command ls /etc/rc.d/rc4.d/S* will list all the services that will be started at run level 4:
/etc/rc.d/rc4.d/S00microcode_ctl
/etc/rc.d/rc4.d/S10network
/etc/rc.d/rc4.d/S12syslog
/etc/rc.d/rc4.d/S20random
/etc/rc.d/rc4.d/S55named
/etc/rc.d/rc4.d/S65smb
/etc/rc.d/rc4.d/S55sshd
/etc/rc.d/rc4.d/S56xinetd
/etc/rc.d/rc4.d/S60lpd
/etc/rc.d/rc4.d/S80sendmail
/etc/rc.d/rc4.d/S85httpd
/etc/rc.d/rc4.d/S90crond
/etc/rc.d/rc4.d/S99local
To be able to reach my server from the internet, the some NAT settings must me made in the ADSL modem.
The easiest option is to set the default address to which IP packages from the internet must be routed to the servers internal IP address 10.0.0.254. Now all IP packages from the internet are send to the server.
The best option is to list explicitly for which TCP and UDP ports IP packages must be routed to the servers internal IP address 10.0.0.254. Other IP packages can be discarded, making life for hackers more difficult. The ports which must be opened are:
| ADSL | Asymetric Digital Subscriber Line. |
| BOOTP | BOOTstrap Protocol. |
| DHCP | Dynamic Host Configuration Protocol. |
| DNS | Domain Name System. |
| FTP | File Transfer Protocol. |
| HTML | HyperText Mark-up Language. |
| HTTP | HyperText Transfer Protocol. |
| IMAP | Internet Mail Access Protocol. |
| IP | Internet Protocol. |
| LPD | Line Printer Daemon. |
| POP3 | Post Office Protocol version 3. |
| NAT | Network Address Translation. |
| RFC | Request For Comment. |
| RXD | Receive Data. |
| SMTP | Simple Mail Transfer Protocol. |
| SSH | Secure SHell. |
| TCP | Transmission Control Protocol. |
| TXD | Transmit Data. |
| USB | Universal Serial Bus. |
| UDP | User Datagram Protocol. |
[1] RFC3022; Traditional IP Network Address Translator (Traditional NAT); Available at ftp://ftp.rfc-editor.org/in-notes/rfc3022.txt
[2] DNS and BIND; Paul Albitz and Cricket Liu; O'Reilly Publishing
[3] Sendmail; Bryan Costales with Eric Alllman; O'Reilly Publishing
[4] Apache; The Definitive Guide; Ben Laurie and Peter Laurie; O'Reilly Publishing
[5] Using Samba; Jay Ts, Robert Eckstein and David Colloier-Brown; O'Reilly Publishing; Digital copy available at http://www.samba.org/samba/docs/using_samba/toc.html
| Home | fwiarda@fwiarda.com |